Creating a Jira Discovery Project: Part 2 - Workflow & Views | #68
In part two of my Jira Discovery series, I explain how to create your workflows and all the views you need to follow my Discover, Build framework.
This is the second part of my series on Jira Product Discovery (JPD). I’m not gonna gush on about JPD in this blog, as I’ve already done it plenty in the last one. If you want to read why I encourage you to try it (and why I love it), read and follow the instructions in the below blog first.
In the next blog, coming in the next few weeks, I’ll share how to automate a template business review project task for the assignee of an initiative, and how it will appear on your views if you follow the instructions below.
Update: this is live and can be found below.
Pre-requisites
The first blog is also a prerequisite to this one, as many of the fields I’ll have told you to create are used or referenced here.
There is also one other caveat, that until JPD come out with the hierarchy feature, I’ve added the below two fields, a select and text field. These are used for filtering so that parent tickets line up in lists first, with children below them.
This is entirely personal preference, and perhaps a bit extra, but I like things to work the way I want them to, and I need these settings for it to do that 🤷
Is Parent Opportunity
This is a Select field with Yes and No Options, which will be chosen if the idea has children. I use this when trying to replicate an opportunity solution tree in JPD
Parent Key
This is a short text Field, which will just be the key of the parent. Handy for converting cards on a miro board into JPD Ideas.
Update: JPD have sent me a demo of the work that has already begun on issue types and their relationships, which you can watch here
Now that we have the pleasantries behind us, let’s get to the good stuff. Oh and maybe just subscribe if you want. That would be lovely
Creating the Workflow
As you are aware if you’ve read the last post, I already have a field for opportunity stage. This is just for opportunities, so I can’t use it as my main status workflow.
I suspect JPD will probably add multiple workflows for different idea types at some point, so I just have one very basic status workflow that mostly works for all the idea types I have.
I don’t see the need for complexity here at this point. I might later add some workflow rules (example: validating that boulders or big rocks can’t move to In delivery without a documentation link), and maybe I’ll add some transitioning functionality at some point if people on my team get lost easily on where the status goes to next, but I genuinely don’t see the value in the effort I’d have to put into that at this point.
I think this is best treated like a nimble solution for planning, and the workflows should reflect that. Simplicity in planning is important or other people won’t adopt the solution.
To edit your workflow, head to Project Settings → Workflow
My Workflow
Click the icons on the top for the corresponding status below and add each of them. Each one of my status’ are ticked to allow any status to move into them.
To-do status
Idea (also the create status by default - see above)
Prioritized for Discovery
In Discovery
Ready to Start
On Hold
In-progress status
In Delivery
Done status
Done
Closed
View Settings
Again with the emojis? Well, it’s easier this time, as they are the same emojis as I have on the opportunity type field. So go back, check the names for those, and copy them in here when you are done.
Before we create the All ideas view, I just want to give a couple of warnings.
Turn off autosave on every view when you create it
This is so important, especially as JPD haven’t released the functionality to lock view editing yet. So many times I’ve tinkered with a view and forget to turn this off, overwriting the filters/ordering that I painstakingly introduced.
Personally, I think this should be off by default even when view restrictions are in place, but you just have to remember to do it now. I suspect at some point (like myself) you will forget to turn this off and edit your view without even thinking.
You won’t actually lose your settings when this is disabled, and if you close the tab, you’ll get a warning. It’s quite safe to turn this off.
Create a copy of your All Ideas view and hide it in a section
Again, another protection so someone doesn’t edit an important screen. This screen is what is used for creating tickets, so you don’t want this to change too often. This will also be solved by view restrictions, so it should just be temporary.
Once you follow the steps for the all ideas view below, you should copy the board as a new list, go to Project Settings → Features → Create Ideas and set this view like I have below. I haven’t made it mandatory, as I have too many fields on it.
I use these when creating issues from Slack and Miro, so I don’t want to have to fill out everything on a workshop.
Creating views
View creation is incredibly easy, so I don’t think I need to spend any time on that.
The only thing that might catch you out is that roadmaps (now, next, later etc) are created on board views. Apart from that, it’s very straightforward.
If you want to speed things up, follow the steps below.
Create the All Ideas view, then copy it as a new list for each of the other list views I mention below.
Next, do the same for the Initiative Roadmap view, copying that as a board for each of the other roadmap views.
Then, create the Initiative Timeline, then copy that into a new timeline view for each timeline listed.
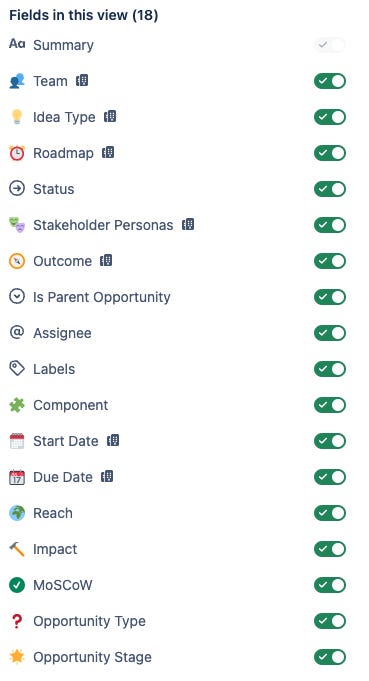
Finally, delete or change the fields I don’t mention if you want to copy my structure.
I’ve played around with each of these views, and this is what I feel is important/useful to have in the sidebar. I don’t see the need for an opportunity timeline, as we track opportunities in a roadmap rather than specific dates in JPD.. This might be personal preference though.
Fields will also be personal preference, and I suggest you review after a few months to whittle down the ones you don’t have any inputs in for the different idea types.
I also don’t use the view descriptions. I don’t think they are necessary, since I’ve already given very detailed descriptions on the fields.
Note: I won’t give you visuals of all the views, as this blog would be far too long. I’ll just share one of each view type, so you get the idea.
All Ideas
All Outcomes
All Initiatives
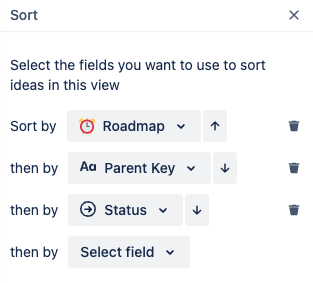
Initiative Roadmap
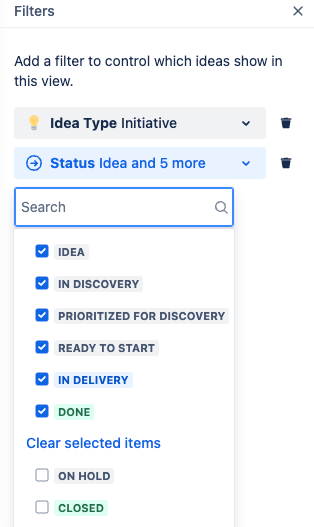
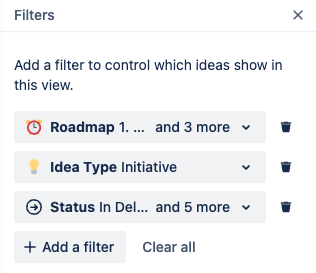
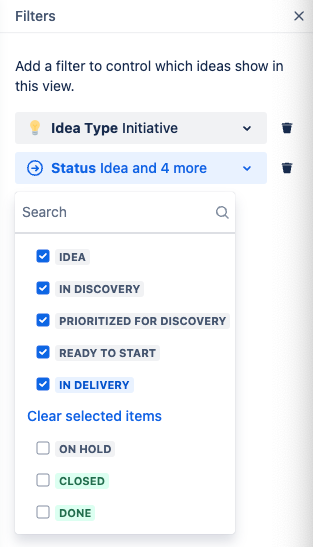
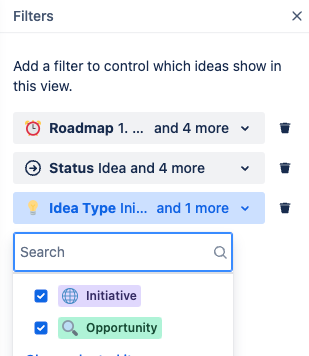
Filter out empty values and done tickets
Initiative Timeline
All Timelines use my Start date and Due Date fields. That is set in the calendar setting in the top left below.
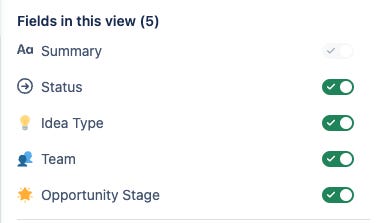
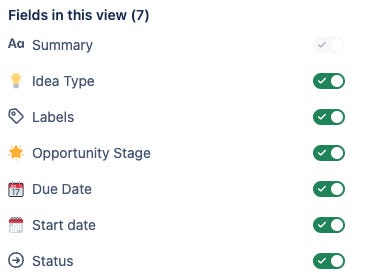
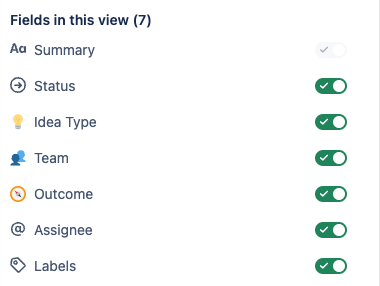
Note the fields hidden from view here. They are already used in the timeline, but if you are editing an initiative from this view, its handy to have these at the top.
All Opportunities
I’ve also filtered by labels here, so I can filter out certain labels.
You might spot the Daily tie score metrics, which I mentioned in a previous blog
Opportunity Roadmap
Filter out done tickets and include initiatives
Opportunity Timeline
Filter out done tickets and include initiatives
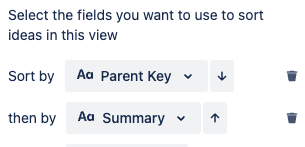
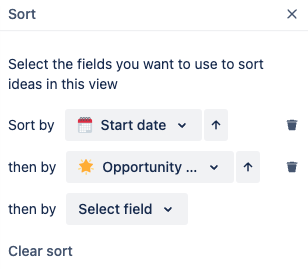
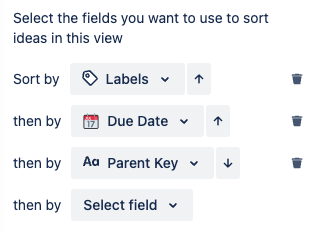
Sort by Start date and Opportunity Stage
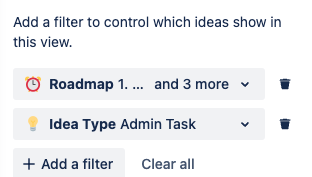
All Admin Tasks
Admin Tasks Roadmap
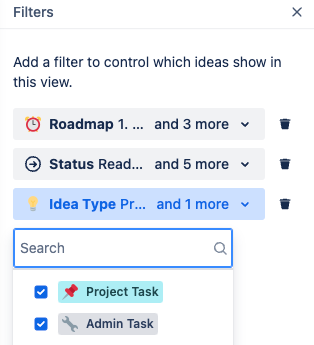
All Open Project Tasks
All Project Tasks Roadmap
All Tasks
All Open Milestones
For Milestones, I had a configuration I liked in my previous role, but I lost that, and I think I’ll probably wait til the hierarchy update to give this a proper review. I’ll update this section when I have it.
Milestones Roadmap
Same filter and fields as above.
Personal and Shareable groups
I think it is important to have a specific section in the sidebar for the creators on your JPD to have a place to test out new views or filtering without having to worry about messing up the main ones.
It’s also useful to have a page for shareable views where you can track a specific label for a project, especially if a particular stakeholder needs a detailed roadmap.
And that is all for this episode.
I have some other Product Operations content here if you found this useful.
For my past tips check out my past posts on Substack or check out the hashtag #JohnsTipOfTheWeek on LinkedIn.
I’d love if you subscribed! I’m trying to build a bit of a following to try and help folks in the industry and make their jobs a little bit easier.


