How to configure Jira screens and issue types | #39
Unlock Jira's full potential with this guide on customizing screens and issue types to streamline your team's workflow.
In the dynamic world of software development, the ability to adapt and tailor project management tools to fit your team's unique workflow is not just beneficial—it's essential.
Jira, a cornerstone tool for many agile teams, offers powerful customization options that, when utilized effectively, can significantly enhance both the efficiency and clarity of your product management process. This guide gives detailed step by step instructions into one of Jira's most impactful customization capabilities: creating new screens and mapping issue types to different screens, as well as customizing fields and input forms on these screens.
Customizing Jira screens can sometimes be really difficult and unintuitive but making yourself do so ensures that your team can focus on the information that's most relevant to them, reducing clutter and streamlining processes. Whether you're looking to tailor Jira Advanced Roadmapping or simply want to fine-tune your project's issue types, understanding how to customize your screens is an important tool to have at your disposal.
Creating them for the first time might seem daunting, so I’ve saved you the hassle - here is the guide on how you can do it yourself.
Prerequisites
Admin access to Jira (Including admin access to your team’s project)
Knowledge of the issue types in use by your team
Note: the links below are templates, you’ll need to change it to the URL for your own instance of Jira: https://yourjirainstance/jira/settings/issues/screens
Step 1. Creating the new Screen
For the purpose of this guide, my team have begun to start using the “Design” issue type, and wish to have a minimised screen with fewer inputs that are required for bugs/epics etc.
First, you will need to create the new screen. Creating from scratch is not advised as you’ll have to find and add all the default fields. It is better to copy your existing default screen.
Go to Screens, find your project’s default screen and copy it using the 3 dots:
Make sure to keep the project name at the beginning, this is important for finding your screen later, and for other people to know that it’s not their screen.
Step 2. Creating the new Screen Scheme
Each Screen type will have to have a screen scheme as well. Go to Screen Schemes and click the “add screen scheme” Button.
Using the same naming convention as you did above, create a screen scheme. Append scheme onto the end of the name you used for above.
Choose the screen you created above in the default screen dropdown.
To confirm you did this step correctly, go back to screens and search for your project name. Your new screen should now be mapped to the correct screen scheme
Step 3. Assigning issue types to a screen
Go to Issue type screen schemes and search for your project’s code. As far as I can tell, you may only see one result here for your project. I don’t think you need to create a new issue type screen scheme here (happy for someone else to correct me).
Click into the one that shows up - likely called the Kanban Issue Type Screen Scheme
You will end up on this screen below, click the “Associate an issue type with a screen scheme” button.
Pick the Issue type you want to map (in my case it is design). The dropdown for Screen Scheme is sorted by date, not alphabetically (🤯). Since you should have just created your new screen scheme, it should show up at the bottom of the list.
Your new mapping should show up now.
To confirm that this has worked, go back to your Jira Project and on the side bar, scroll down to Project Settings:
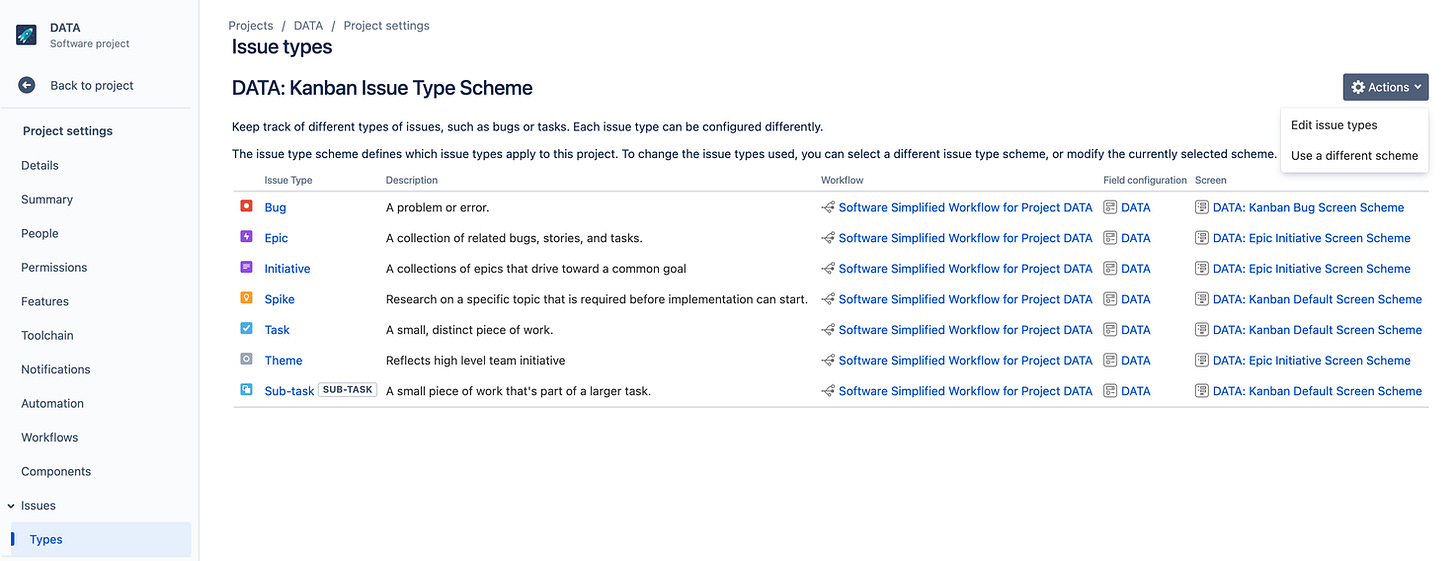
Go to Issues → Types on the side bar in the project admin settings
If your issue was not already available, you’ll need to add it using the actions → Edit issue types button
Move it from the right column to the left and hit the save button at the bottom of the page. If this has been done correctly, you should see the screen you created associated with the issue type you just moved.
Editing screen layout and fields
Much of this is already documented, but since my main purpose for these steps was to remove JAR fields where they don’t need to be (anything lower than an epic). I’ll show you how to edit your screen also.
A good starting point before you edit a screen, is to make sure you are editing the correct screen. From your issue type page you finished on above, hit the create button and choose the issue type you’ve just mapped to a new screen. The new layout should show, and that confirms you are editing the correct one.
This is an important step, as it is actually pretty easy to edit the wrong screen, and it can be quite disruptive for teams who rely on a certain screen config for integrations to CRM software. I know this, as I broke the connection to zendesk when I went playing around with my bug layout! It can easily happen.Cancel this pop-up and open the link to the screen in question into a new tab
This brings you to screen scheme, click through into the screen
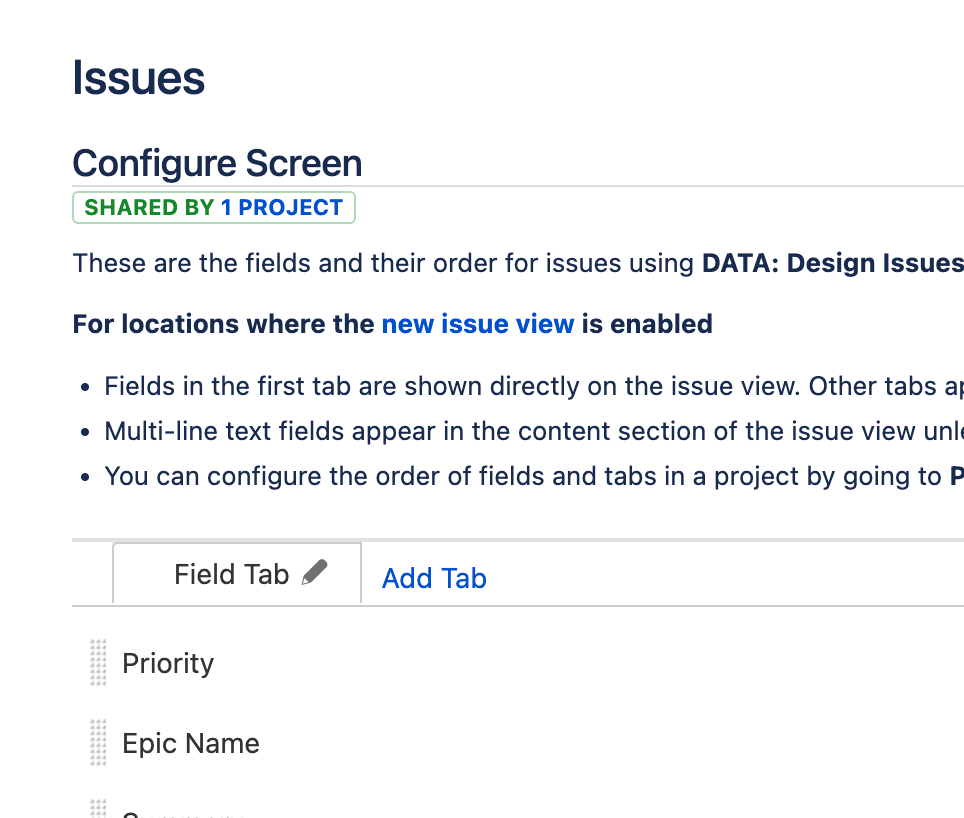
You can also get to this page by going to Screens and searching for the new screen. You now should be on the page where you can edit your screen’s fields and tabs
In our scenario, we want priority moved up on the screen, so I’ll drag and drop the priority field to the top
Hit the Create button on top of the page to show that the Priority field has now moved up to the top
A user friendly screen editor can be found in Issues → Layout → Edit layout settings in your project settings. You need to add the fields in step 4 before they will appear here (I think)
So there you have it! I have some other Product Operations content here if you found this useful. Please let me know if instructions here change, as this was originally created in early 2023, and I know JIRA changes a lot!
For my past tips check out my past posts on Substack, go to my weekly list tip on Medium, or check out the hashtag #JohnsTipOfTheWeek on LinkedIn.


